Windows 7 offers many different views when browsing files and folder using Windows Explorer (also known as ‘Computer’ or ‘My Computer’).
You can manually change the view for any folder, or select a view then apply to all folders – like setting a default view.
The following steps detail how to change the default view in Windows Explorer.
- Open Windows Explorer (also known as ‘Computer’ or ‘My Computer’) and open any folder.
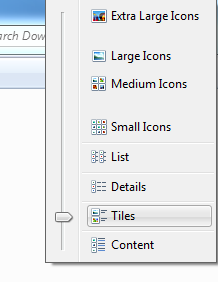
- Click on the ‘Change your view’ button near the top right of the window.
- Select the view style you want to be the default – e.g. ’tiles’
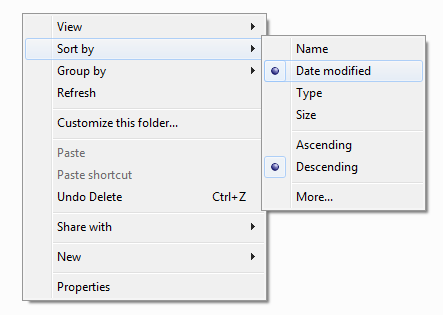
- Right click anywhere in a black space in the explorer window and select ‘Sort by or Group by’ and then select the type you want to be the default – e.g. ‘Date modified’
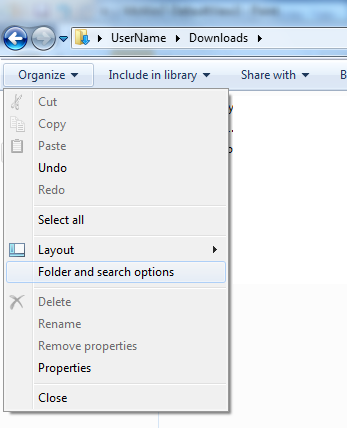
- Once you’re happy with the select view, click the ‘Organise’ button in the top left of the explorer window and select ‘Folder and Search options’
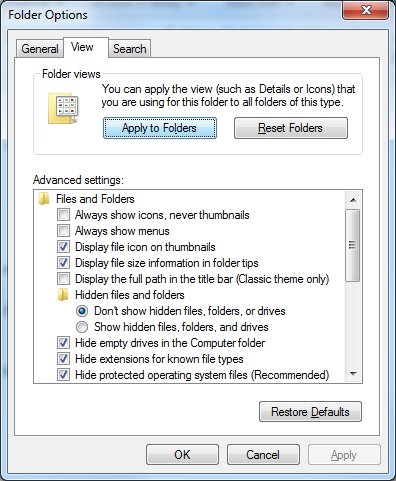
- A new window will open, click on the ‘View’ tab and press the button ‘Apply to Folders’.
- Click ‘OK’ to save the changes
- All folders will now use this view as the default. You can still manually change the view for any folder.


