What is a software package in Configuration Manager?
One of the primary features of System Center Configuration Manager is its ability to distribute software packages to client computers.
A software package gives an administrator the ability to systematically distribute updates to clients. The updates can be new software, command lines, registry modifications, scripts etc. This gives you the ability to centrally manage and standardise an entire network of client computers.
There are three components involved in a software distribution-
The package
This is the ‘what’ of the distribution and can be anything from a software package to a command line.
The package consists of four parts, the source files, the package definition, the program and the distribution points.
The collection
This is the ‘who’ of the distribution and is where you specify who receives the update. Normally we would target workstation computers, but you can also target groups or particular users. These are defined by “membership criteria” within the collection and for the update to be received the client must meet one or more of the criteria.
The advertisement
This is the ‘when’ of the distribution and is how you specify when the update runs. The advertisement is a process of applying a specific package to a specific collection. Advertisements can be set to start as soon as possible or at some point in the future and can be set to expire at a specific time.
Note:
The following steps will detail how to create a software package. It will add the software to the ‘Run Advertised Programs’ list in control panel of each of the targeted client computers.
If you want the software to install automatically on the client computer, continue through to ‘How to set a mandatory assignment’
Step1: Creating the Package
Source Files:
Source files are the installation files for the package. You will need to save these files to a shared folder which can be access by the Configuration Manager computer account.
In this example our source files will be saved to \SCCMSEVERSMS_Source
Before you can create the package, you will need to obtain the required .exe or .msi files for the installation. You will also need to know the installation switches to use to make the installation automated. If you are unsure where to get the files or how to do a silent install see http://itsupportguides.com/configmgr-sccm.html or http://www.appdeploy.com
In this example we will be creating a software package for Mozilla Firefox 3.6
The source file has already been downloaded and saved the source folder, which will be \SCCMSERVERSMS_SOURCEMozillaFirefox3.6
- Open the System Centre Configuration Manager console
- Expand ‘Computer Management’
- Expand ‘Software Distribution’
- Expand ‘Packages’
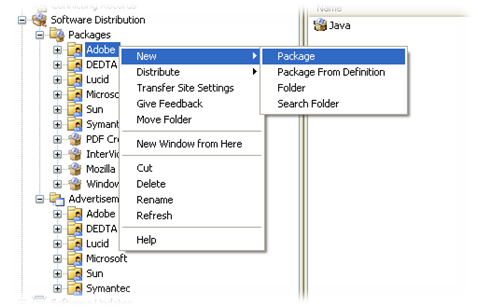
- Right Click on the folder which corresponds to your software update. (e.g. Mozilla)
- Select ‘New’ and then ‘Package’
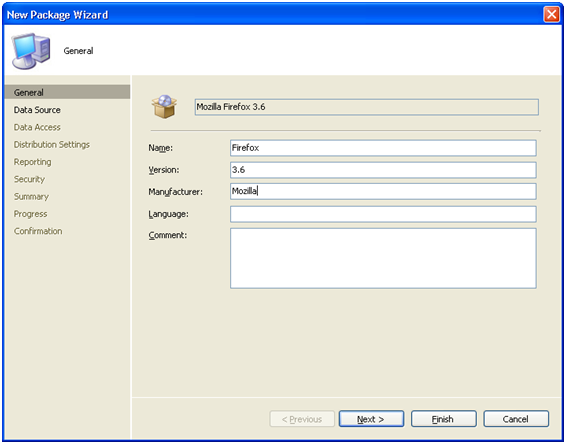
- Enter in the required information
- Click ‘Next’
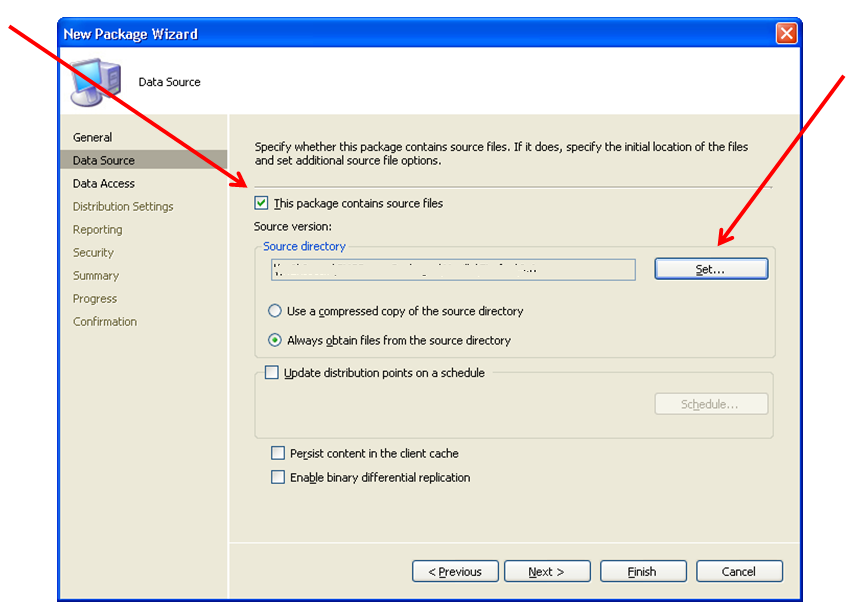
- Select ‘This package contains source files’
- Click on ‘Set’ and browse to the source file folder
- Click ‘OK’ and ‘OK’ again
- Click ‘Finish’, ‘Next’ and then ‘Close’.
Step 2: Create the program
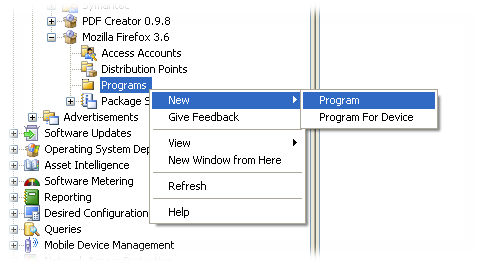
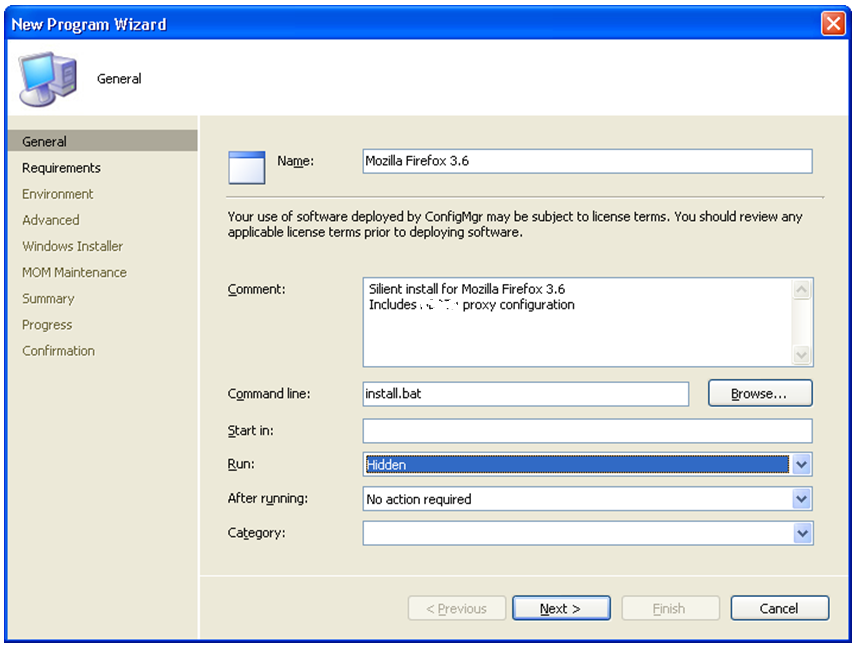
- Expand the new package, right click on ‘Program’ and select ‘New’ then ‘Program’
- Enter in the same name as the package (e.g. Mozilla Firefox 3.6)
- Under ‘Command line’ enter in the command which starts the installation (e.g. install.cmd )
- Under ‘Run’ select ‘Hidden’
- Click ‘Next’
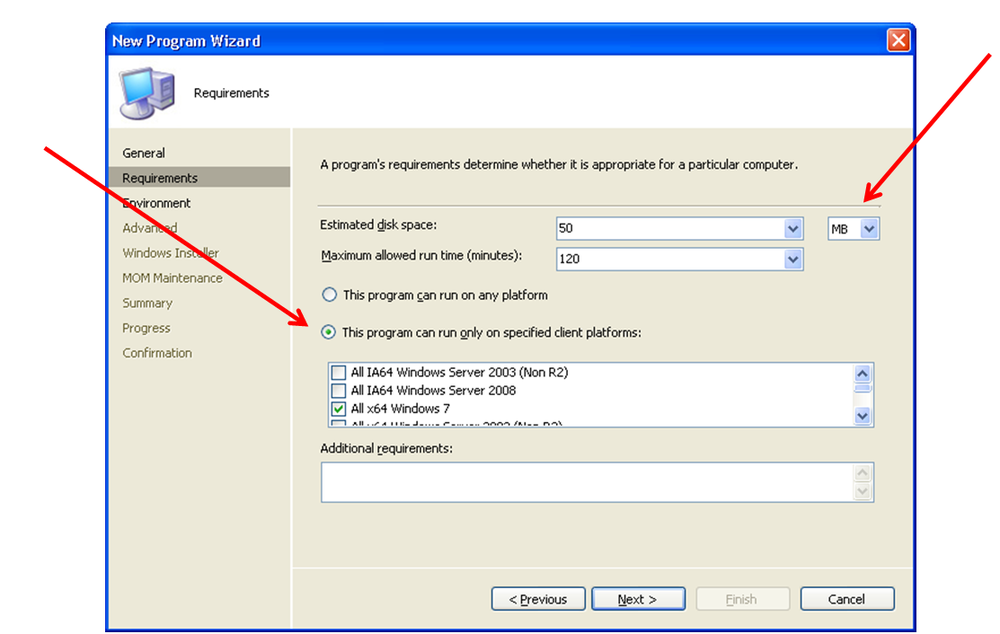
- Enter in an estimate required disk space (e.g. 20 MB)
- Select ‘This program can run only on specified client platforms’ and select the required platforms, e.g.
-
- All x64 Windows 7
- All x64 Windows Vista
- All x64 Windows XP Professional
- All x86 Windows 7
- All x86 Windows Vista
- All x86 Windows XP Professional
- Click ‘Next’
- Under ‘Program can run:’ select ‘Whether or not a user is logged on’
- Click ‘Next’, ‘Next’, ‘Next’, ‘Next’, ‘Next’ and then ‘Close’.
Step 3: Distribute the software
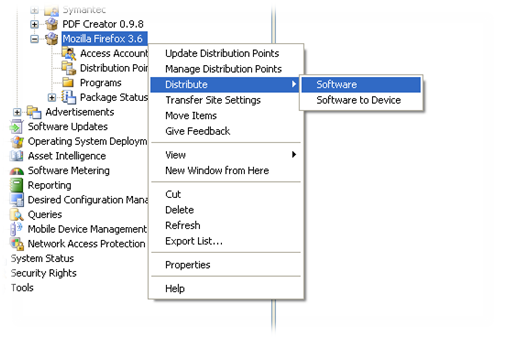
- Right click on the package and select ‘Distribute’ and then ‘Software’
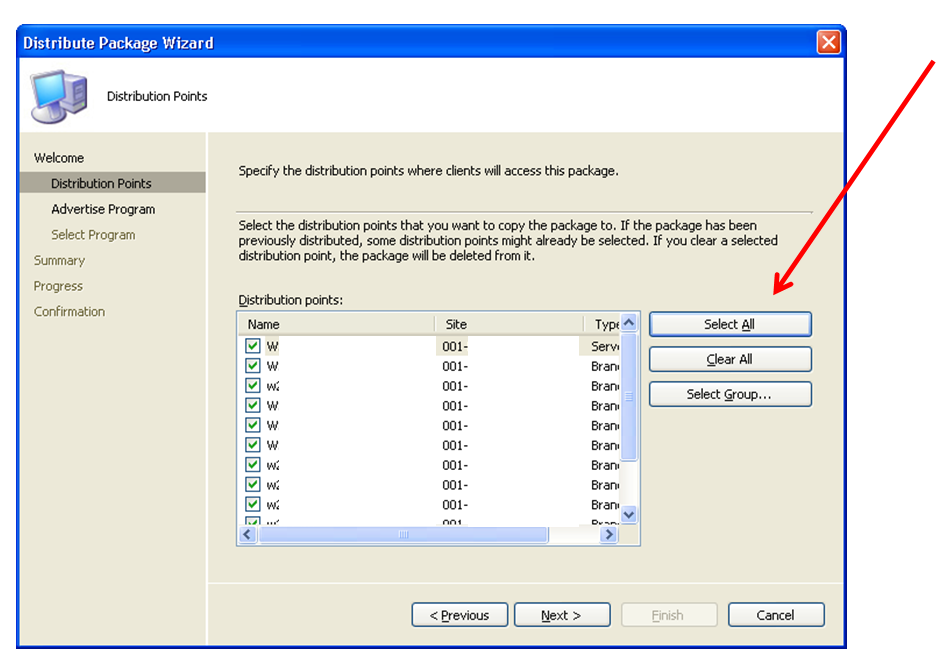
- Click ‘Next’
- Click ‘Select All’ and then ‘Next’
- When asked ‘Do you want to create a program from this package’ select ‘No’
- Select ‘Finish’, ‘Next’ and then ‘Close’
Step 4: Create advertisement
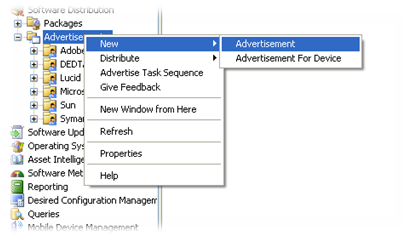
- Expand ‘Advertisements’ and right click on the relevant folder (e.g. Mozilla)
- Select ‘New’ and then ‘Advertisement’
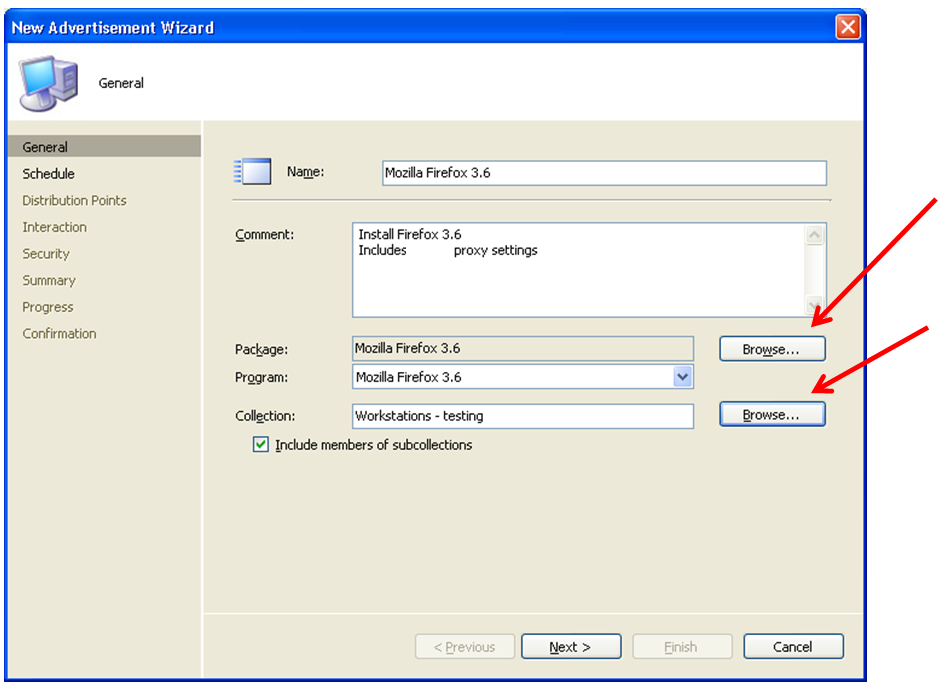
- Under ‘Name’ enter in the name of the advertisement (e.g. Mozilla Firefox 3.6)
- Under ‘Package’ select ‘Browse’ and select the relevant package (e.g. Mozilla Firefox 3.6)
- Click ‘OK’
- Under ‘Collection’ select ‘Browse’ and select the targeted collection
- Click ‘OK’
- Click ‘Next’
- Click ‘Next’
- For both options select ‘Download content from distribution point and run locally’
- Click ‘Next’, ‘Next’, ‘Next’, ‘Next’, and then ‘Close’
Step 5 (optional): How to set a mandatory assignment
Mandatory assignments are used to force the package to install automatically at a selected time.
With a mandatory assignment the package will start to run at the indicated time, which can be As Soon As Possible or a given time.
- Open the System Centre Configuration Manager console.
- Expand ‘Computer Management’
- Expand ‘Software Distribution’
- Expand ‘Advertisments’
- Open the required container, (e.g.Mozilla)
- Double click on the advertisement, (e.g. Mozilla Firefox 3.6)
- Under ‘Collection’ select ‘Browse’
- From the list, select the ‘All Windows Workstations or Professional Systems’ collection and click ‘OK’
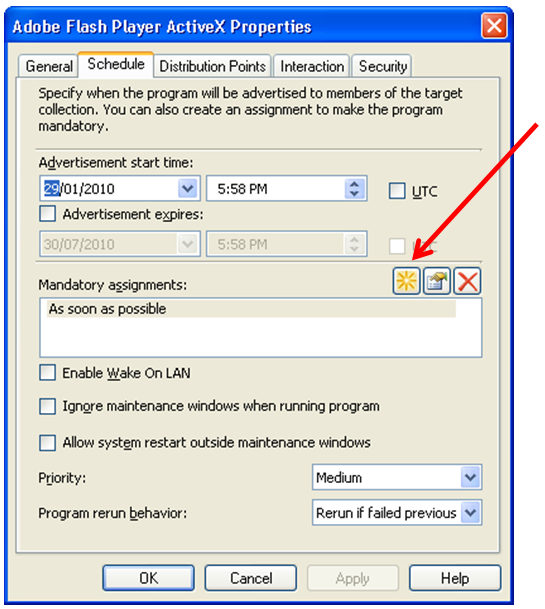
- Select the ‘Schedule’ tab
- Click on the yellow star icon
- Either select a start time or choose ‘Assign immediately after this event’ and then ‘As soon as possible’
- Click on ‘OK’ to save the changes
