The following guide will demonstrate how to create a new report using Microsoft System Center Configuration Manager R3.
In this example we will be creating a report which lists all printers (local and networked).
Please note: The report results includes the standard ‘Microsoft Office Document Image Writer Driver’ etc “software printers” – we suggest you export the report to excel and filter these out.
The report will also be linked to ‘Computer information for a specific computer’ report, allowing you to see detailed information on the systems listed.
How to create a report using SCCM R2:
- With the Configuration Manager Console open,
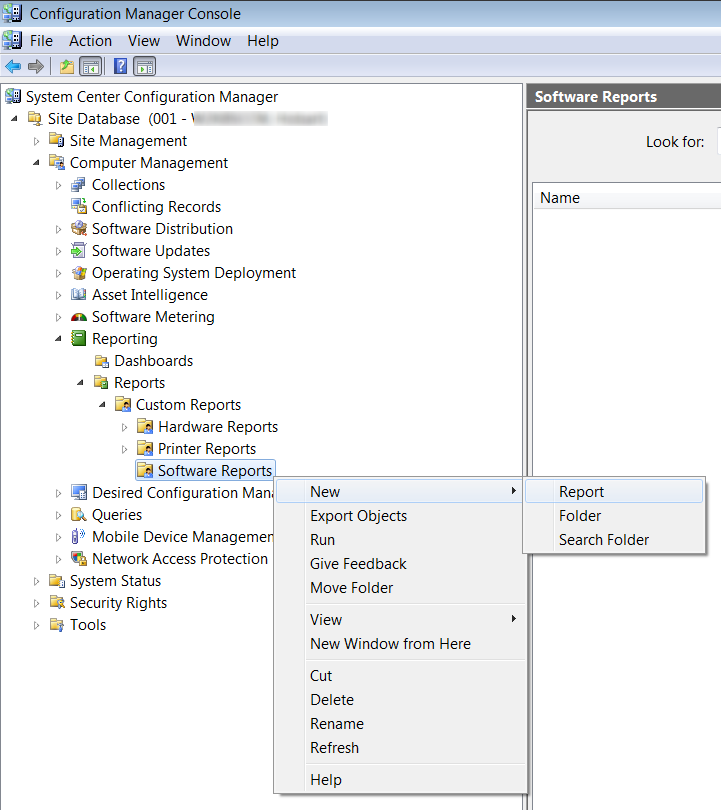
- Example the ‘Computer Management’ node, then ‘Reporting’ and ‘Reports’
- Right click on ‘Reports’ (or your custom reporting folder)
- Select ‘New’ then ‘Report’
- Under ‘Name’ enter in the desired name, e.g. List All Printers (Local and Networked)
- Select a category, e.g. Device Management
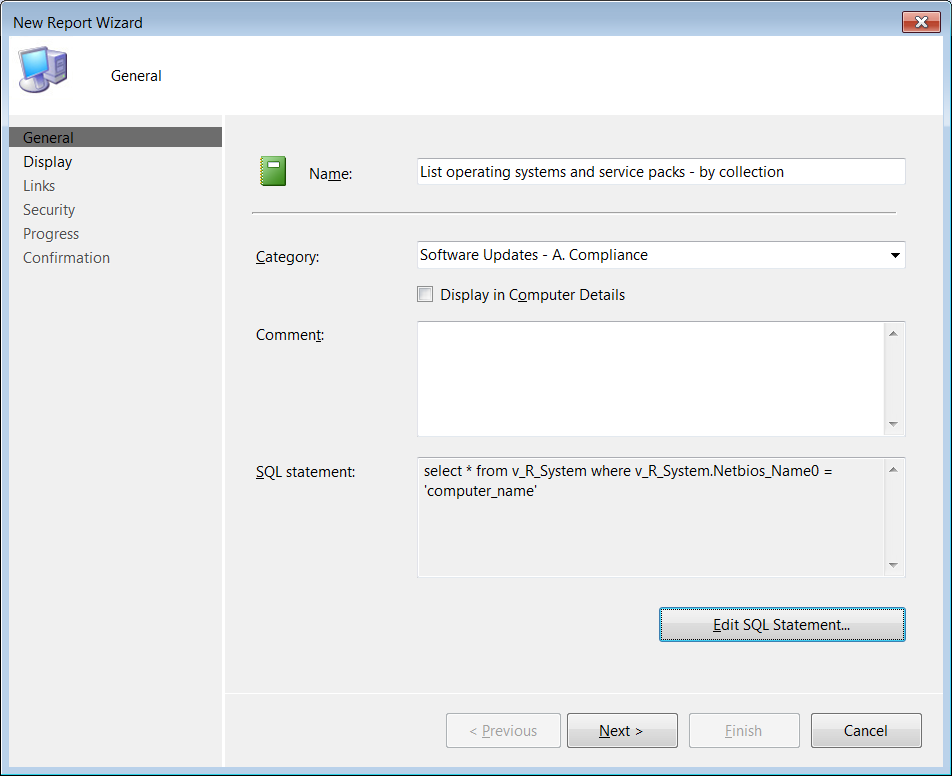
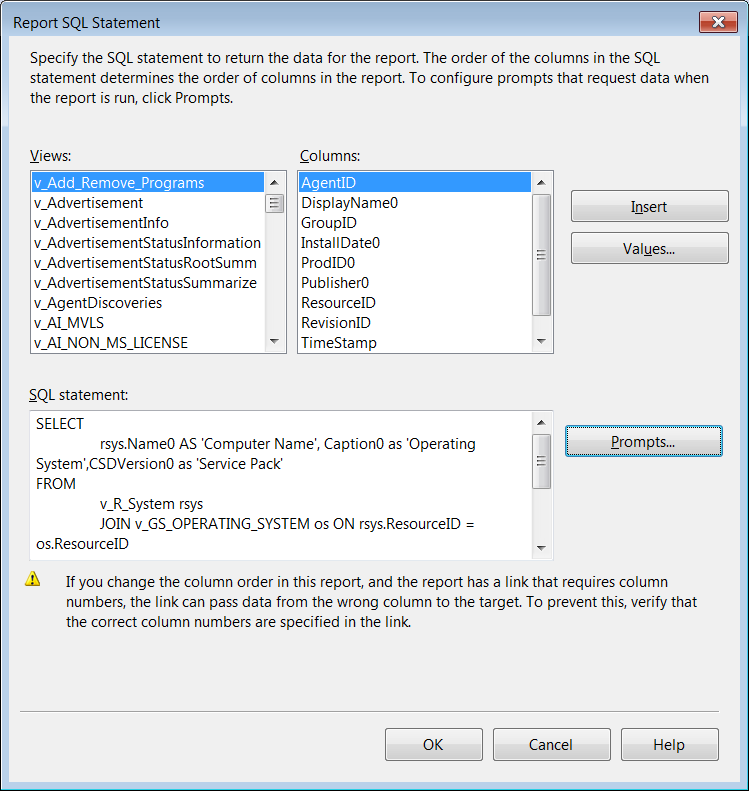
- Click on the ‘Edit SQL Statement’ button
- Under ‘SQL statement’ enter the following code:
-
SELECT SYS.Netbios_Name0,printer.DriverName0, printer.Location0,printer.PortName0,printer.PrintProcessor0

  FROM v_GS_PRINTER_DEVICE printer


  JOIN v_R_System SYS ON SYS.ResourceID = printer.ResourceID


ORDER BY SYS.Netbios_Name0 - Click ‘OK’ to return to the ‘New Report Wizard’
- Click ‘Next’ then ‘Next’ again
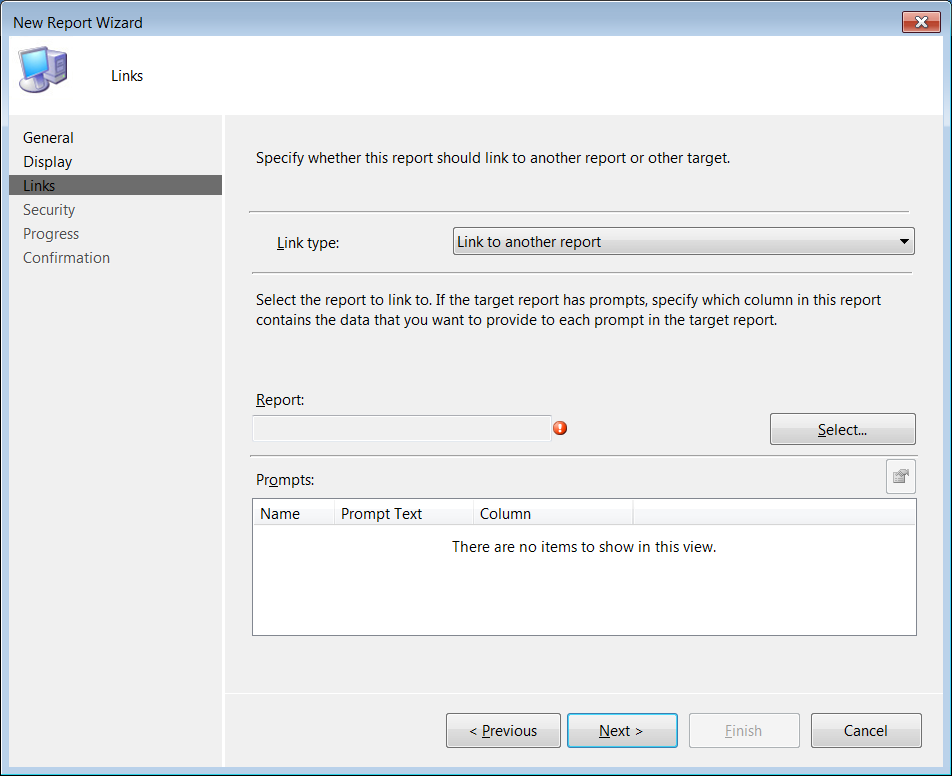
- Under ‘Link type’ select ‘Link to another report’
- Under ‘Report’ click on the ‘Select’ button
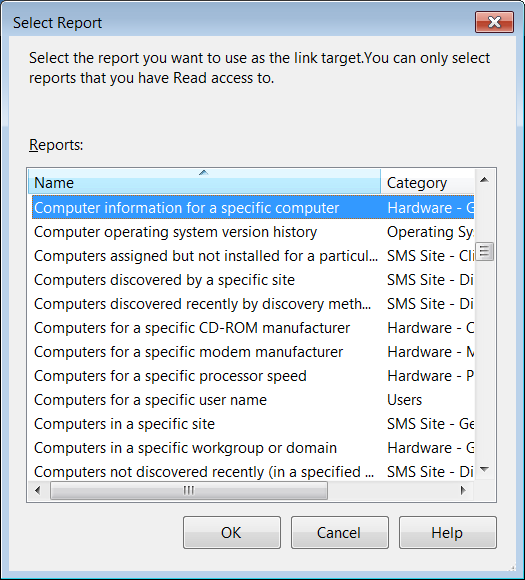
- From the reports list, select ‘Computer information for a specific computer’
- Click ‘OK’ to close the window
- Click ‘Next’, ‘Next’ then ‘Close’
The run the report:
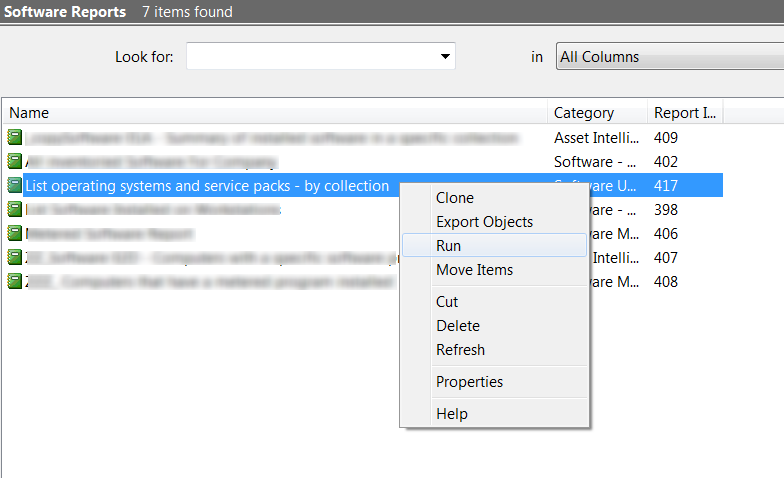
- Navigate to where the report was saved/created
- Right click on the report and select ‘Run’
- Click ‘Display’ to display the report
- The report will list all the printers from the database
- To get detailed information on each system click on the arrow to the left of the system name.
