Exchange 2010 has introduced a new way to manage access to administrators. Instead of the traditional Active Directory access control entry (ACE) based authorization model which was used in Exchange 2007 it now uses Role Based Access Control (RBAC).
As an Exchange administrator this allows you to delegate access in a much more granular way instead of an all or nothing approach.
RBAC can managed by roles or role groups. Role groups have and Active Directory security group, which gives you the advantage of managing it from Active Directory Users and Computers.
To be able to grant or remove role assignments you will need to use an account which is a member of the ‘Organization Management’ role group.
How to create an Exchange Role Group
In addition to the standard built-in role groups you are able to create new role groups to suit your own requirements.
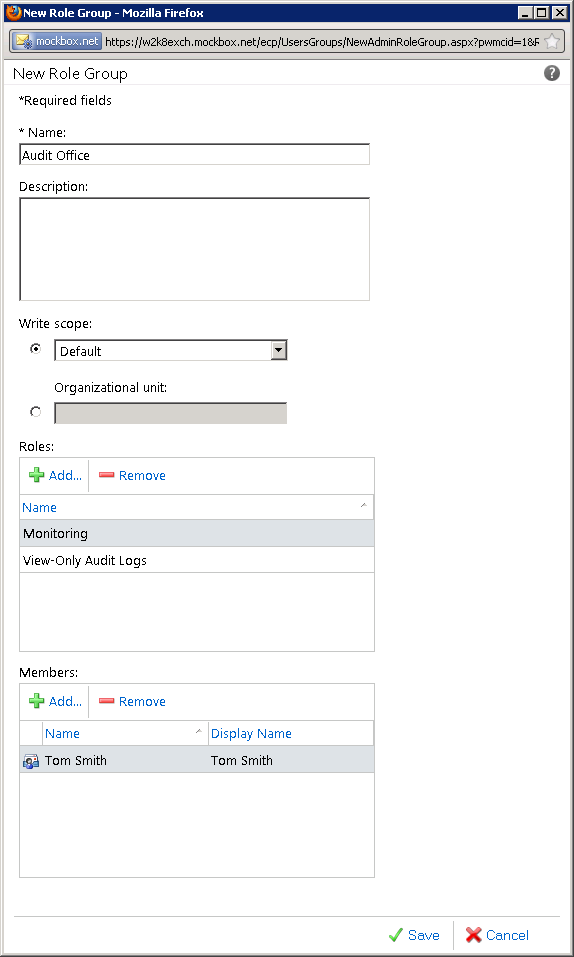
In this example will be creating a new role group called ‘Audit Office’, assigning the ‘Monitoring’ and ‘View-Only Audit Logs’ roles, and assigning the role group to ‘Tom Smith’.
Option 1: Using the Exchange Management Shell
- Using the Exchange Management Shell, run the following commandlet(s):
New-RoleGroup -Name "Audit Office" -Roles "Monitoring", "View-Only Audit Logs" -Members "Tom Smith"
Option 2: Using the Exchange Control Panel
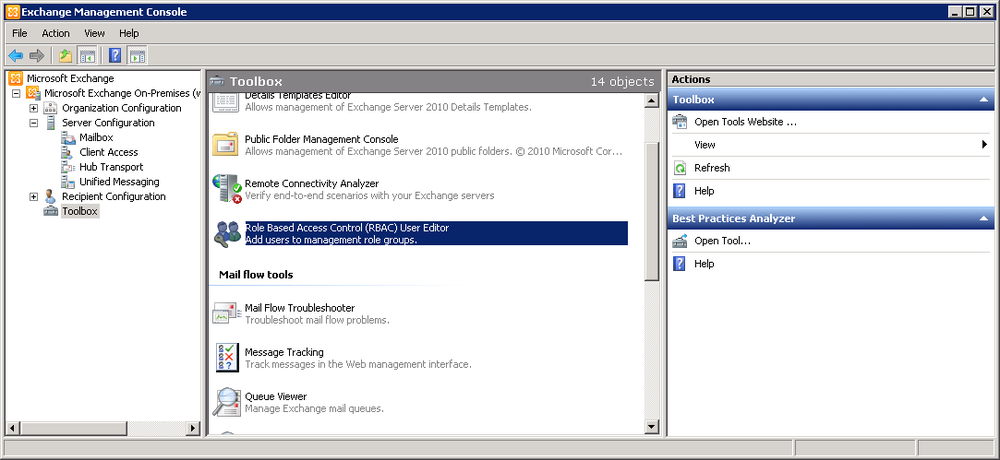
- In the Exchange Management Console (EMC), navigate to Toolbox in the console tree.
- In the work pane, double-click Role Based Access Control (RBAC) User Editor to open the user editor in the Exchange Control Panel (ECP).
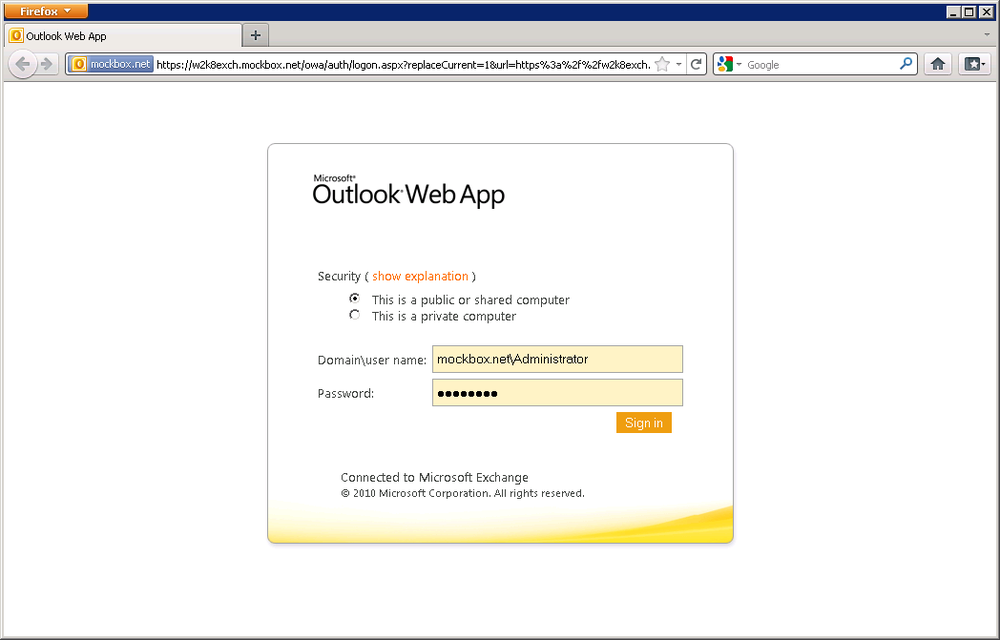
- Provide credentials in the Domainuser name and Password fields for an account that has the permissions needed to open the user editor in the ECP.
- Click Sign in.
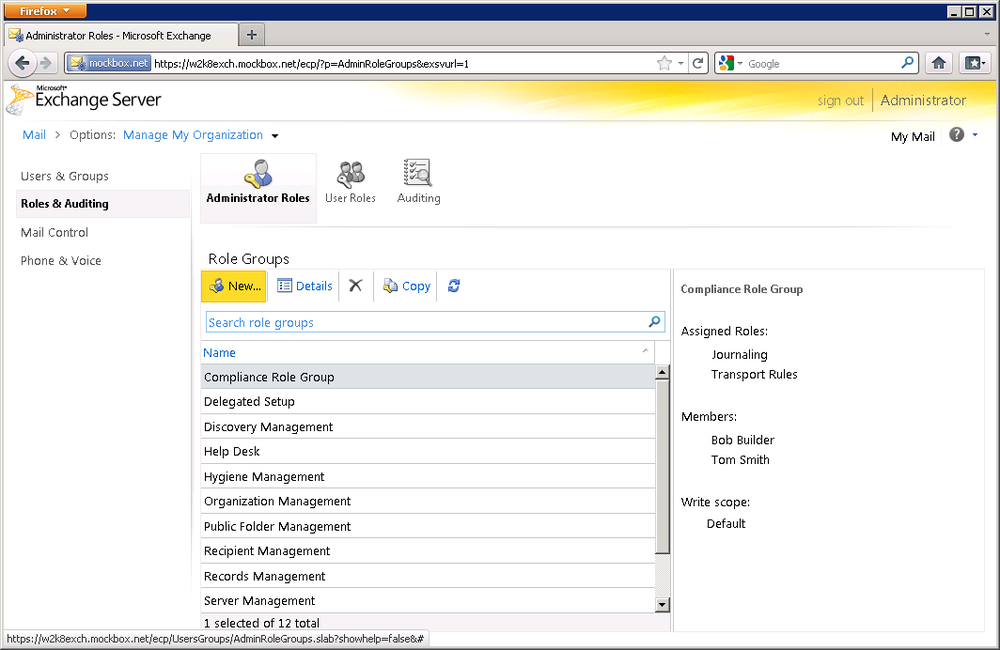
- Click the Administrator Roles tab.
- Click New under Role Groups.
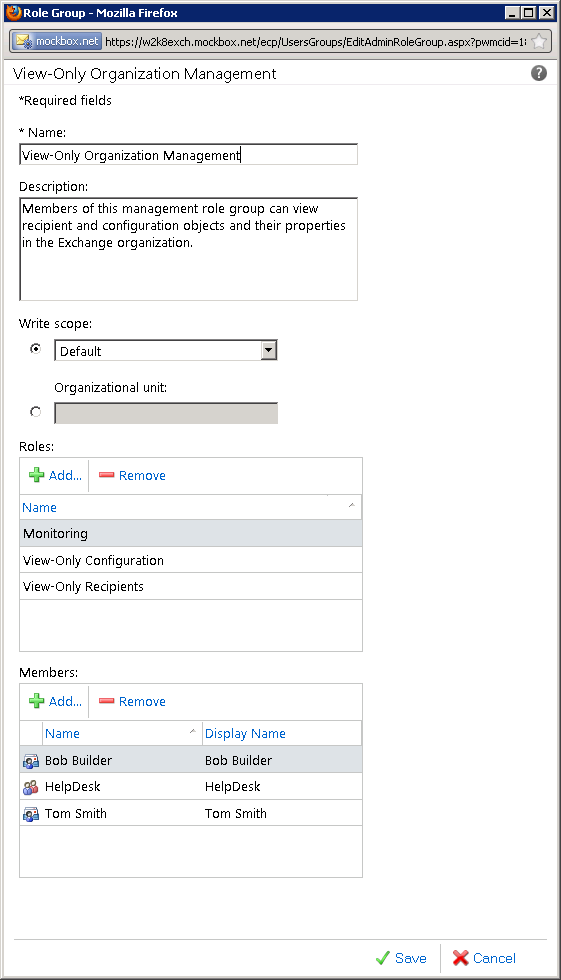
- In the Name field, enter the name of the new role group.
- In the Description field, provide a short description of the purpose for the role group.
- Select one of the two following Write scope options:
- A write scope from the drop-down box. In this box, you can select either the default write scope or a custom write scope.
- Organizational unit Select this option and provide an organizational unit (OU) if you want to scope this role group to an OU.
- In the Roles section, do the following:
- To add one or more management roles to the role group, click Add and select the roles you want to add. You can select multiple roles at one time. Then click OK.
- To remove one or more roles from the role group, select the roles you want to remove, and click Remove.
- In the Members section, do the following:
- To add one or more members to the role group, click Add and select the mailboxes, role groups or universal security groups (USGs) you want to add. You can select multiple items at one time. Then click OK.
- To remove one or more members, select the members you want to remove, and click Remove.
- When you’re done, click Save to create the new role group.
How to assign the ‘View-Only Organization Management’ role group
Exchange role groups can be assigned to individual user accounts or security groups.
In the examples below we will be working with the ‘View-Only Organization Management’ role group.
Option 1: Using Active Directory Users and Computer
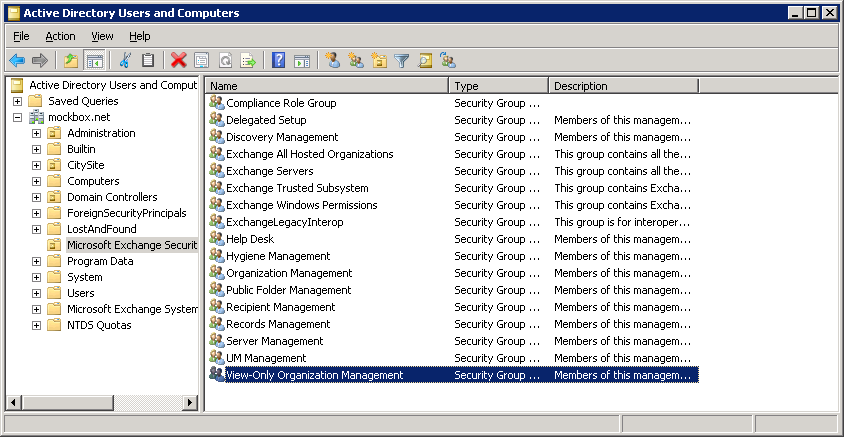
- Using the Active Directory Users and Computers tool, navigate to the ‘Microsoft Exchange Security Groups’ Organisational Unit
- Open the ‘View-Only Organization Management’ object
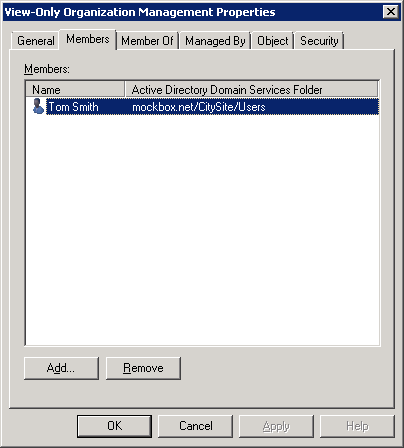
- Select the ‘Members’ tab
- Add the user account or security group using the ‘Add’ button.
Option 2: Using the Exchange Management Shell
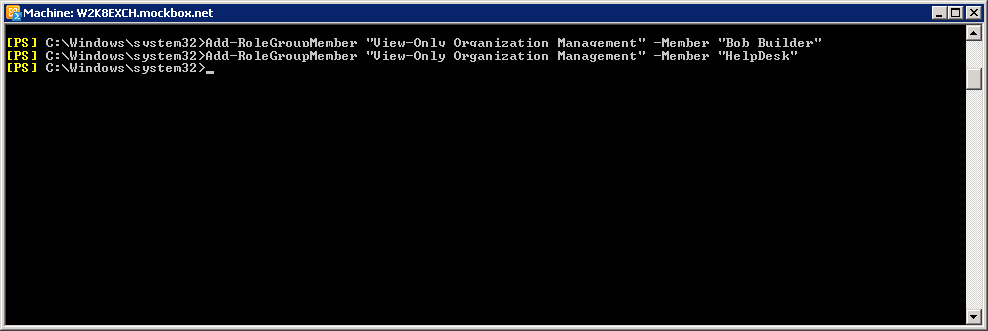
- Using the Exchange Management Shell, run the following commandlet(s):
Assign Role Group to a user account
In this example will be assigning the ‘View-Only Organization Management’ role group to the ‘Bob Builder’ user account.
Add-RoleGroupMember "View-Only Organization Management" -Member "Bob Builder"
Assign Role Group to a security group
In this example will be assigning the ‘View-Only Organization Management’ role group to the ‘HelpDesk’ security group.
Add-RoleGroupMember "View-Only Organization Management" -SecurityGroup "HelpDesk"
Option 3: Using the Exchange Control Panel
- In the Exchange Management Console (EMC), navigate to Toolbox in the console tree.
- In the work pane, double-click Role Based Access Control (RBAC) User Editor to open the user editor in the Exchange Control Panel (ECP).
- Provide credentials in the Domainuser name and Password fields for an account that has the permissions needed to open the user editor in the ECP.
- Click Sign in.
- Click the Administrator Roles tab.
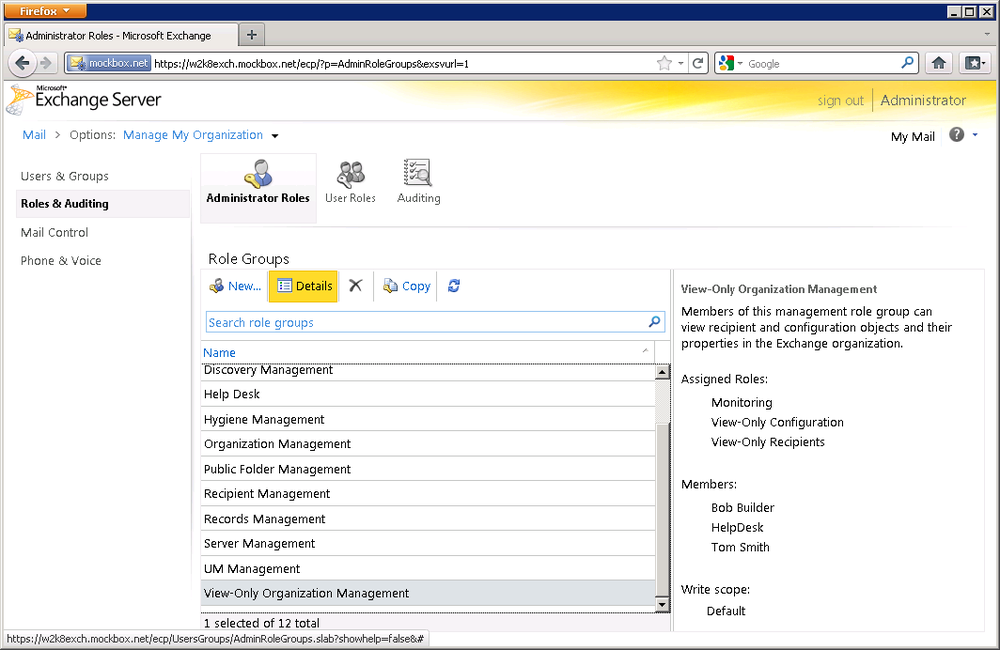
- Select the role group you want to add members to and, then click Details.
- In the Members section, click Add.
- Select the users, USGs, or other role groups you want to add to the role group, and then click OK.
- Click Save to save the changes to the role group.
How to list members of a Role Group
The following Exhange Management Shell commandlet can be used to list all members of a Role Group.
In this example we will list the members of the ‘View-Only Organization Management’ role group.
Get-RoleGroup 'View-Only Organization Management' | Get-RoleGroupMember

