[SOLVED] Lenovo – Built-in webcam camera not working (Windows 8)

Problem

When attempting to use the built in camera on a Lenovo laptop the camera does not work. Instead of seeing the image from the camera you see an image with a grey background and a white camera with a cross through it.

The same image is seen with all applications.

lenovo-camera1

Solution

Using Windows 10? See [SOLVED] Lenovo – Built-in webcam camera not working (Windows 10)

This strange little issue appears to be a bug with the Lenovo software – through no intervention from the user the camera has become disabled through the “privacy” setting and needs to be re-enabled.

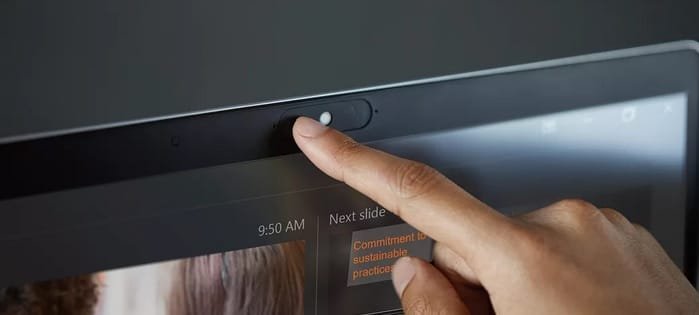
Solution 1: Check for a lens cover

  1. Look for where your camera is on the laptop – usually this is above the monitor on the frame
  2. Check if it has a lens cover and whether it is closed
  3. These are usually a small plastic strip that slides over

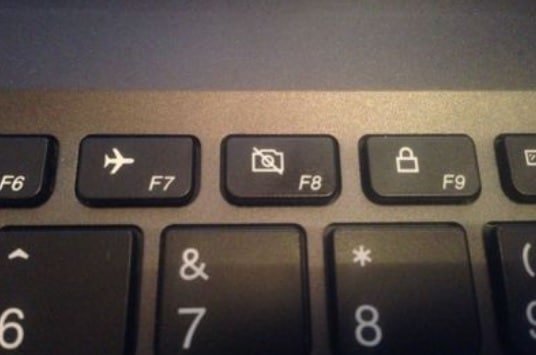
Solution 2: Enable using keyboard button

  1. Look on the laptop keyboard for a camera icon – this is usually around F8
  2. Press the key to see if it enables the camera
  3. If it doesn’t – try holding the ‘Fn’ key and the camera key

Solution 3: Enable using LenovoSettings app

To re-enable the camera (using Windows 8 or Windows 8.1):

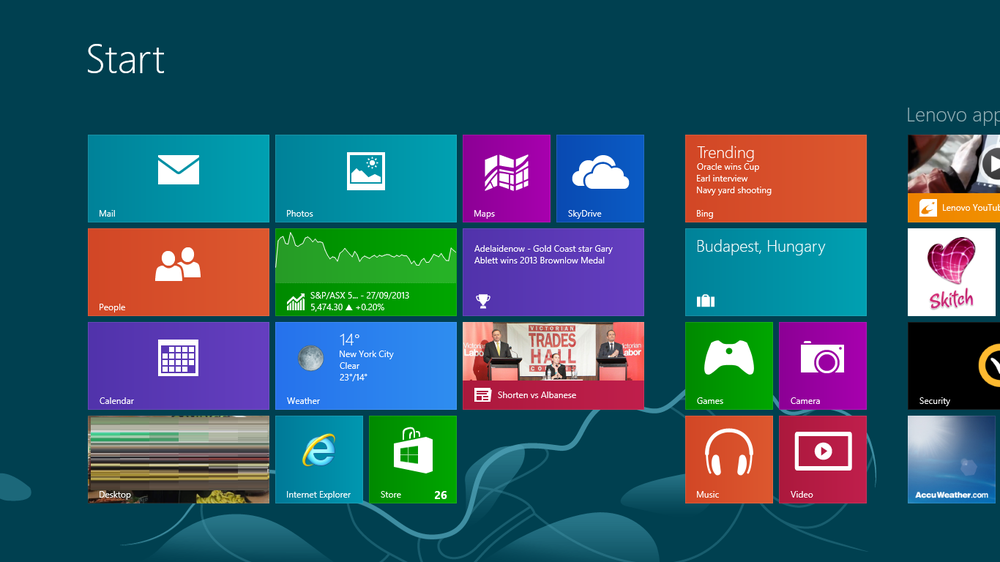
  1. Press the Windows button to open the start screen
  2. lenovo-camera2
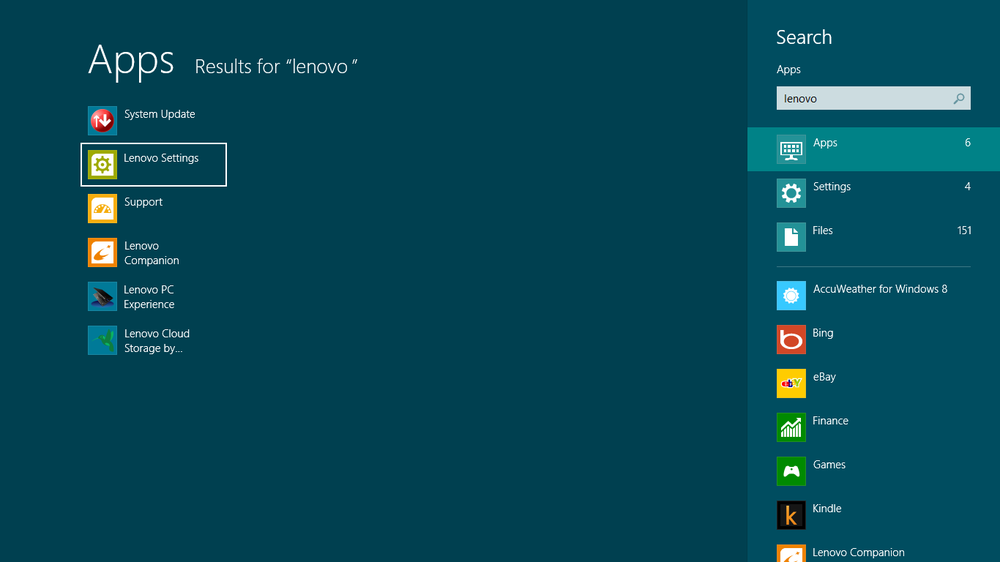
  3. Type ‘lenovo’ to search for the Lenovo software
  4. lenovo-camera3
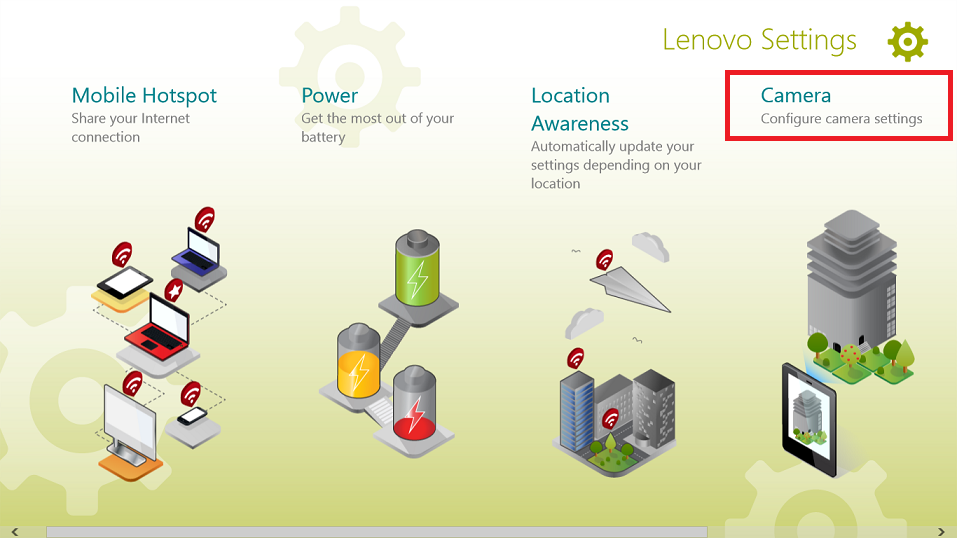
  5. Click on the icon for ‘Lenovo Settings’
  6. lenovo-camera4
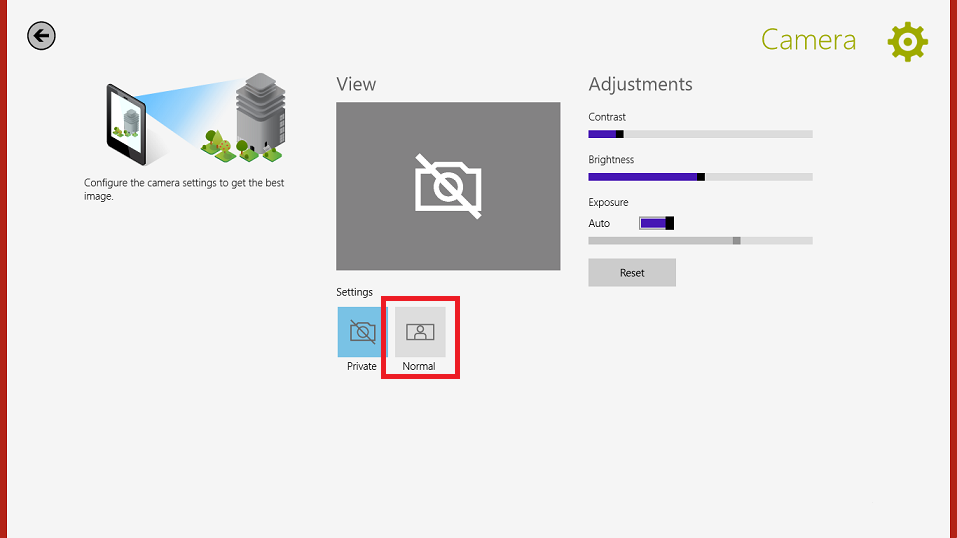
  7. Click on the ‘Normal’ button
  8. If it’s already set to ‘Normal’ – click ‘Private’, apply the changes, then switch back to ‘Normal’ again and apply the changes.
  9. lenovo-camera5

Help! This didnt work!

If these instructions didn’t help you, you could try …

Updating the Lenovo Settings Dependency Package software.

To do this you’ll need to go to the Lenovo website, search for your model of Lenovo and download and install the Lenovo Settings Dependency Package software.

After this has been done repeat the instructions above.

support.lenovo.com/us/en/products?tabName=downloads

Uninstalling the Lenovo Settings Dependency Package software

This is moderate risk – you may find that some hardware stops working correctly or that you need to use the software to manage settings, but cannot due to it being uninstalled. Having said this, on my Lenovo laptop I do not use this software (for both Windows 8/8.1 and Windows 10) with no issues at all.

  1. To uninstall the software click on the Windows button on your keyboard,
  2. type ‘programs and features’ when you see it appear in the list – click on it.
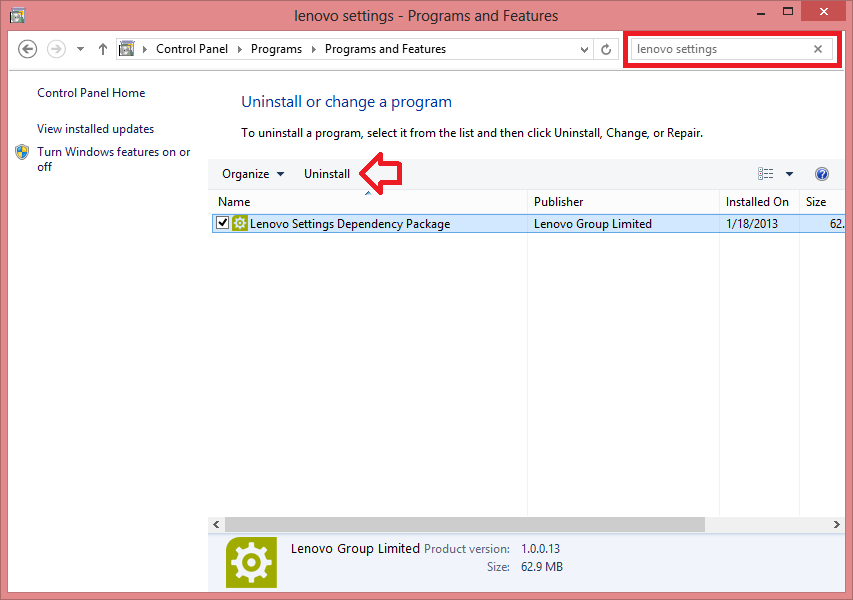
  3. Search for “lenovo settings” select it from the list and click uninstall.
  4. uninstalllenovosettings1
  5. Restart and the camera should be working again.

Tagged in

54 comments on “[SOLVED] Lenovo – Built-in webcam camera not working (Windows 8)

  1. As there are problems using Lenovo settings on Win 8.1, solved the problem by using command prompt with the command C:Program FilesLenovoCommunications Utilitylmcfcameractrl.exe privacy -fname:Integrated Camera -state:0

  2. Hi, I have Windows 10, and my settings app doesn’t have a privacy setting for the camera. The screen is always grey with that little crossed off camera icon, and I have no idea how to solve this.

    1. Hey – I installed Windows 10 last night (upgraded from Windows 8.1) to see what’s different.

      My camera worked straight away and I didn’t have any of the Lenovo apps or settings available. I then installed the lenovo settings dependency package (for Windows 10) – still not settings. I then found on the Windows App Store an application called “Lenovo Settings” – and it had an option to turn the camera into privacy mode! (read – I think you need both the dependency package and the lenovo settings app – but if you already have the grey camera icon showing, I would say you do).

      The grey camera icon showing is definitely
      a lenovo thing, so if you’re seeing it it’s from the installed lenovo software … which should also mean you could try uninstalling to fix it.

      If you still have the problem, give the steps here a go and let me know how it goes.

      https://www.itsupportguides.com/windows-10/solved-lenovo-built-in-webcam-camera-not-working-windows-10/

  3. For Lenovo model B490 running Windows 7, find and run the “Lenovo ThinkVantage Tools” application in the Start Menu. In this window, click on “Web Conferencing”. This launches “Communications Utility”. Click the button labelled “Show my video image” (this should be the first button on the right side of the webcam image). The button will change to “Hide my video image” and your image will be visible. You can click “Close” and exit the Communications Utility as well as the ThinkVantage Tools window.

    Note that if you cannot find this image and the webcam image says “The camera is being used by another application” then you should restart your computer and try again.

    1. Thank you thank you! This was an ongoing mystery for me. Your Communications Utility solution worked like a charm for a T440s still in Windows 7 (preferring to let others debug Win10 before I convert)

Leave a Comment

Your email address will not be published. Required fields are marked *