Unfortunately a great deal of websites put little or no effort into providing their content in a printer-friendly fashion.
No matter what your website has to offer sooner or later someone will need to print a page. With a bit of luck it will print how it appears on the screen, although this is unlikely. The good news is it’s relatively easy to optimise your website for print which will greatly enhance the value of your website.
The secret to creating printable pages is being able to identify and control the “content areas” of your website. Most websites are composed of a header, footer, sidebars/sub-navigation, and one main content area. Control the content area and most of your work is done.
First, some tips on making your website print-friendly:
Size Your Page For PrintBy far the most common print specific adjustment is setting the page width. Depending on your website your may need to control the width of the whole body or just the main content areas.
Avoid Unnecessary HTML TablesAs with any website design avoid using tables to structure content, instead use DIV elements and control the layout using CSS. The only place for tables is for content – that is, tables of information. Know Which Portions Of The Page Don’t Have Any Print ValueWeb visitors print your page because of the content on it, not to see the supporting images and presentation content. Some common content to remove – advertising, menus and images which are outside of the content. Use Page BreaksIt’s likely that some of your content will be separated over several pages, however this may not be appropriate for the content. You can use the page-break-before and page-break-after CSS properties to control how the content is split over the printed pages. For example, you may want to have all H2 print on a new page. Test!Like any type of programming, testing is important. Note that if you have a website that serves dynamic data, you wont be able to win all the time but you may be able to figure a scheme to format the content most of the time. Be sure to test in multiple browsers such as Internet Explorer, Firefox and Safari. |
How to make your website ‘print friendly’ using CSS
With the following steps you’ll be well on your way to having a print-friendly website.
Step 1: Create the print media CSS link
There are two options for creating the print style sheet – you can use an existing style sheet or create a new separate one.
Option 1: Using an existing style sheet (CSS file)
- Open your style sheet and add the following query to the bottom
@media only print {

}
Option 2: Using a new separate style sheet (CSS file)
- Create a new file called ‘print.css’ along with your other CSS files. In this example the file is saved to itsupportguides.com/template/css/print.css
- Add the following code to the ‘HEAD’ of your HTML document/template
<link rel="stylesheet" href="/template/css/print.css" type="text/css" media="print" />
Step 2: Print a page and take note of the changes required
Print a page from your website and take note of what doesn’t print well – for example, is content being split over several pages? Is some content taking not required on a print out (such as banners and navigation)? Are the headings and text an appropriate size?
Step 3: Identify your content areas and required changes
The easiest way to identify your content areas is by using Firefox and installing the Firebug plug-in.
Firebug allows you to quickly identify each content area by point and clicking.
- If you haven’t already, install Firefox (http://www.mozilla.org/en-US/firefox/fx/) and the Firebug plug-in (http://getfirebug.com/)
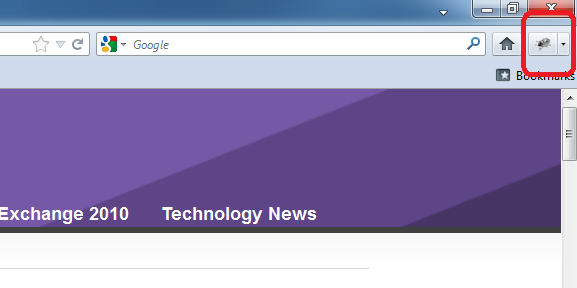
- Open your website and run the Firebug plug-in by clicking on the Firebug icon at the top right of the window
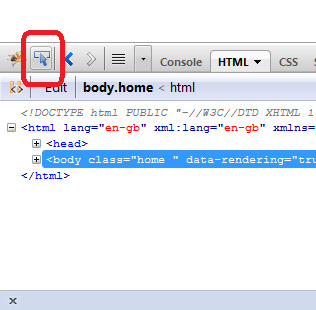
- Click on the pointer icon at the top left of the Firebug toolbar
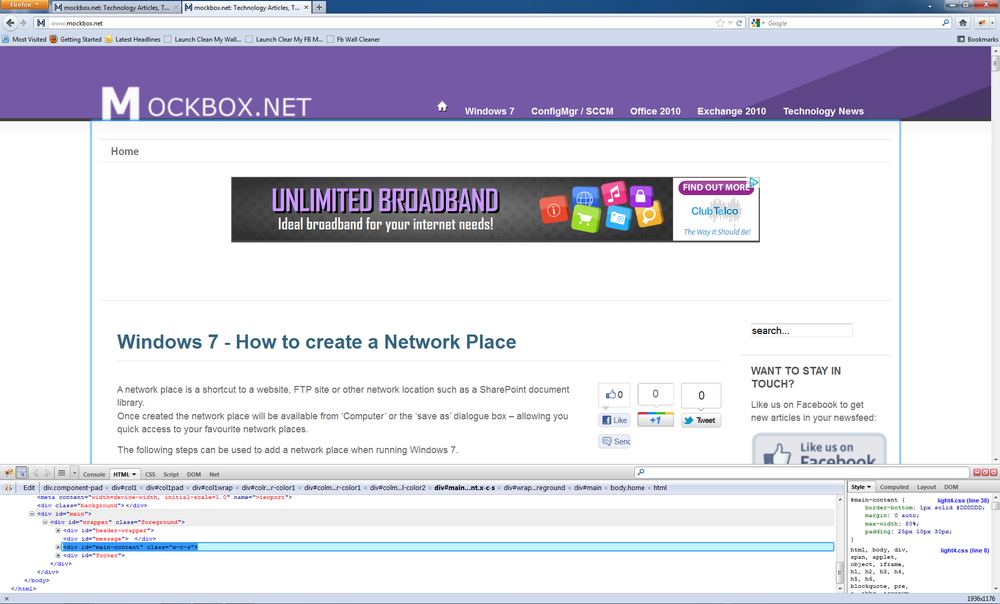
- Using your mouse, hover over your website. You will see a blue highlight around each content area as you hover over. Click on the content area which needs the print-friendly CSS.
- In this example we need to specify the width of the ‘main-content’ DIV element. From the right-hand side of the Firebug tool we can see the existing code (#main-content)
Step 4: Add the print-friendly CSS
- Using the CSS sheet you created in step 1 add you print CSS code. For example
- #main-content { min-width: 1300px; }
- Using print preview check that your print out is working as you want
Step 5: Repeat for each content area
Repeat for each content area which isn’t printing as you want.
Another common change is to disable specific elements, such as breadcrumbs, banners and menus.
You can do this by using the display: none CSS. For example:
#ads-top {display:none; }
.breadcrumbs {display:none;}
And as always – TEST! Print your website landscape and horizontal, print out a few different pages and continue customising until you have the desired outcome.


