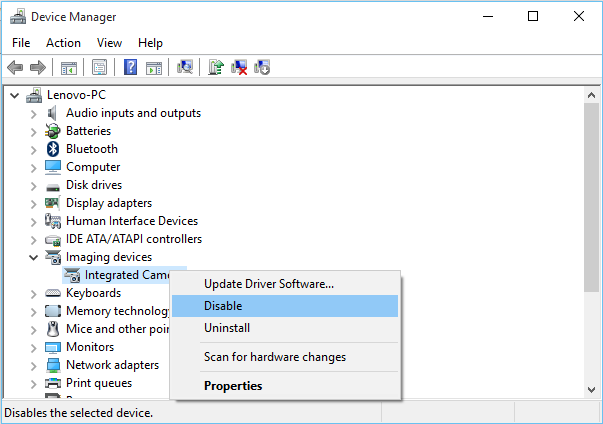
The process below details how to disable devices using the device manager in Windows 10.
When a device is disabled Windows and all applications will not be able to use the device. This can be useful for integrated devices, such as a camera or microphone, that you cannot physically remove but do not want to be used.
Please note: you will need administrator access on the computer to use the device manager.
- Using your keyboard, press the Windows button + R to open the Run window
- Under ‘Open’ type devmgmt.msc and click ‘OK’
- You now need to find the device in the list – finding the right device is critical, as disabling a critical device could damage your Windows installation. ‘Imaging devices’ will include all cameras, ‘Sound, video and game controllers’ will include your audio devices.
- Expand the device group, right-click on the device and choose ‘Disable’
- Click ‘OK’ to confirm.
- The device is now disabled – Windows and applications will not be able to use the device.
- To re-enable it, repeat the process and choose ‘Enable’
HELP! I can’t disable the device
Some devices do not support being disabled – but there is a work around – by install another incompatible device driver.
Note: this won’t physically harm the device, but it may make your computer behave weirdly. I DO NOT recommend this for any critical devices – e.g. display adapters.
- Right-click device and select ‘Update Driver’
- Click ‘Browse my computer for driver software‘
- Click ‘Let me pick from a list of available drivers on my computer’
- Un-tick ‘Show compatible hardware’
- Select a different manufacturer and model,
- Click next, yes, restart etc.
- You should now be able to disable the device using the device manager

